How to
import
export graded footage correctly, deliver for Web & TV.
The Issue
Apple utilizes ColorSync color management to convert colors to display formats intelligently. While this works in theory, in practice, especially on Mac, it has been problematic, resulting in errors and an inaccurate representation of video gamma. On iOS, however, it functions correctly. This inconsistency can be attributed to Apple’s gamma “enhancement” approach and the tagging system that ColorSync relies on for color management. Unfortunately, Mac systems are not the only ones with these issues. There are others as well… To avoid the insanity-evoking experiences I’ve had, I’ll share a solution to achieve the most consistent file playback across various devices (Apple, Windows, Android, TV).
The aim here is to ensure the footage looks visually accurate on as many devices as possible.
Note: When following the workflow an RGB picker readout error of >1 is acceptable.
The initial error often arises from incorrect data levels. Software like Adobe Premiere Pro/After Effects and DaVinci Resolve may expect different data levels than those provided by the colorist. A mistake at this stage can spoil the faithfulness of the footage to the original grading. Luckily, Premiere allows for the adjustment of a file’s data levels via LUT as seen below.
Adobe software expects full data levels = 0-1023
DaVinci Resolve expects video data levels = 64-940
Fix
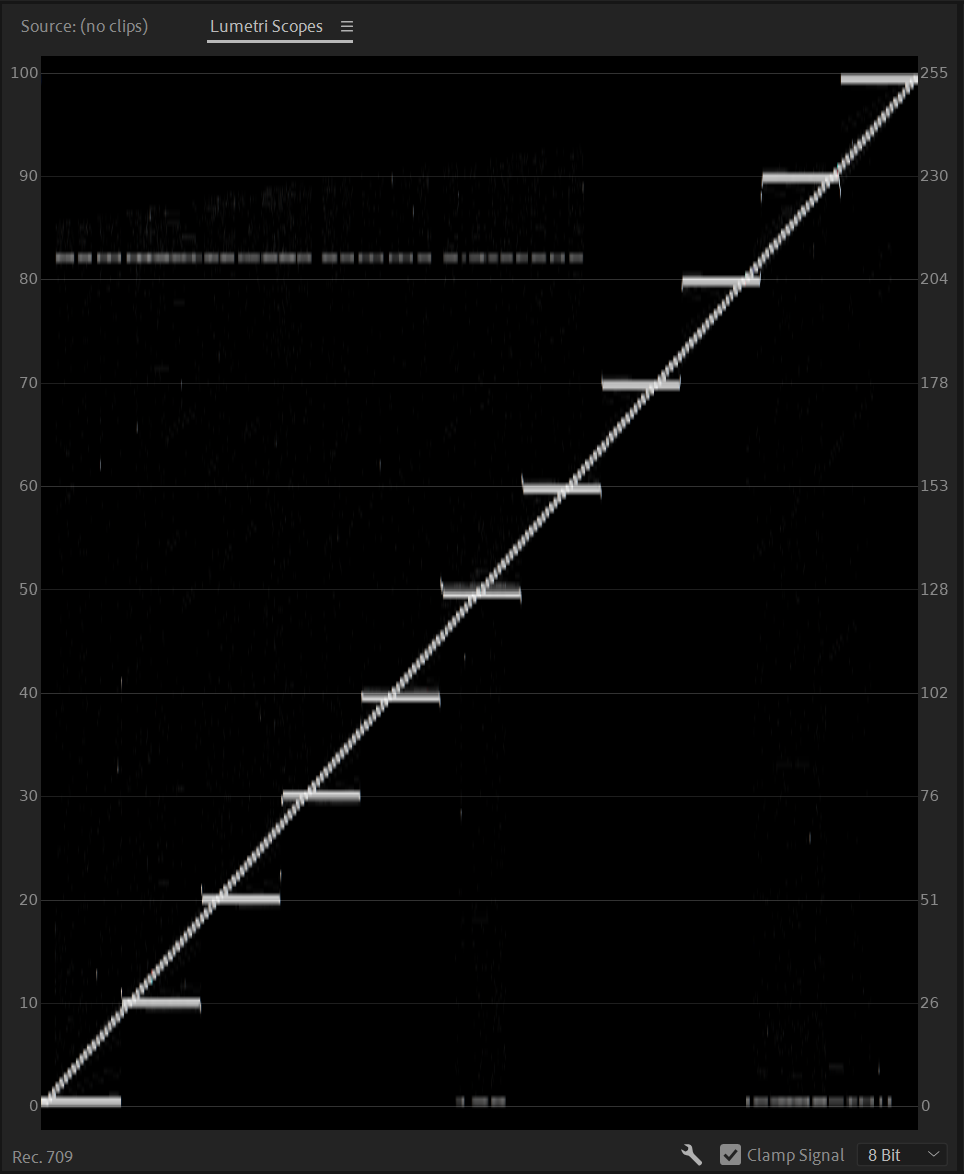
To avoid data level errors, I include a chart file matching the export’s data levels. If this chart displays correctly on the scopes, the rest of the footage will too. Scopes should show a straight line from 0-255 on an 8-bit scale and from 0-1023 on a 10-bit scale. A deviation from this indicates incorrect data levels.
Take note of the wrong data levels. The lines are not hitting 0 or 255.
Wrong Levels
Correct Levels
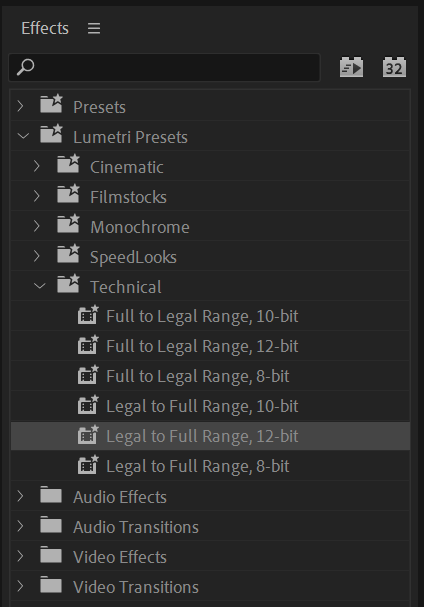
When the levels are not as expected go to effects > lumetri presets > technical and change the levels accordingly. Best to be used as an adjustment layer over all the graded footage.
HQX clips are in 10-bit
444 clips are in 12-bit
2. The fix
Every step in the process is crucial to signal how the media should be handled.
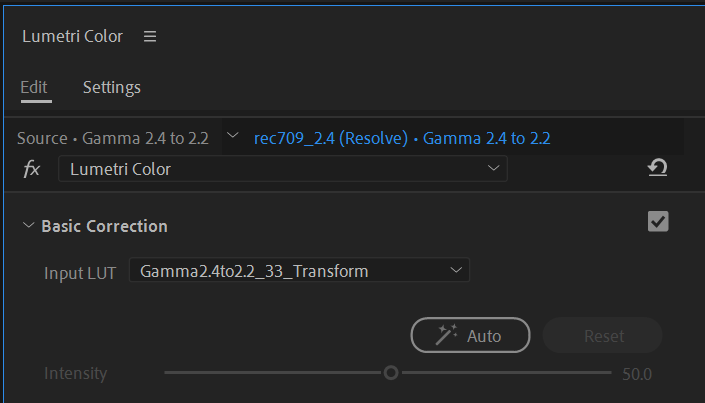
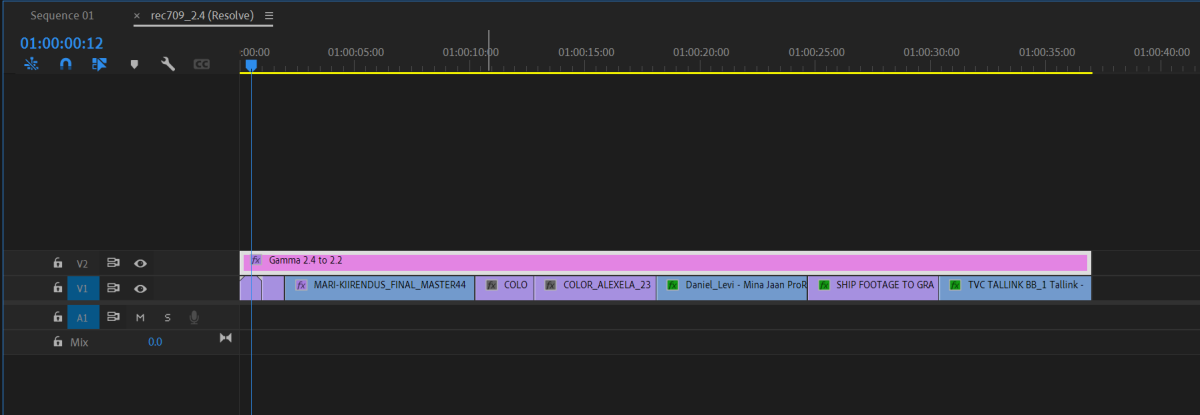
For web delivery, apply a LUT included here to transform gamma 2.4 to 2.2. Feel free to make an adjustment layer and just lay it over all the graded footage.
The chart RGB values should now read as follows: 21-120-227
2. For broadcast delivery, no need to change anything. The files will playback as intended by default.
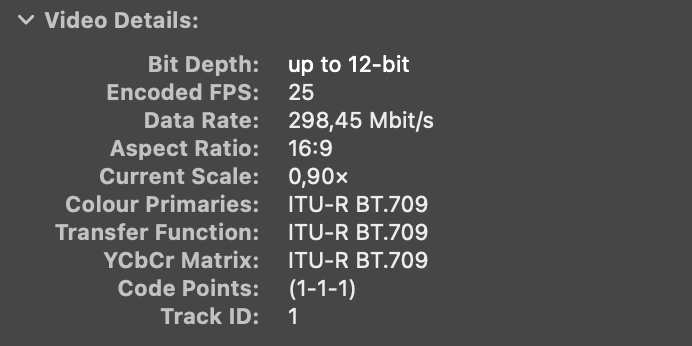
The tags in QuickTime inspector (⌘+i) should be 1-1-1
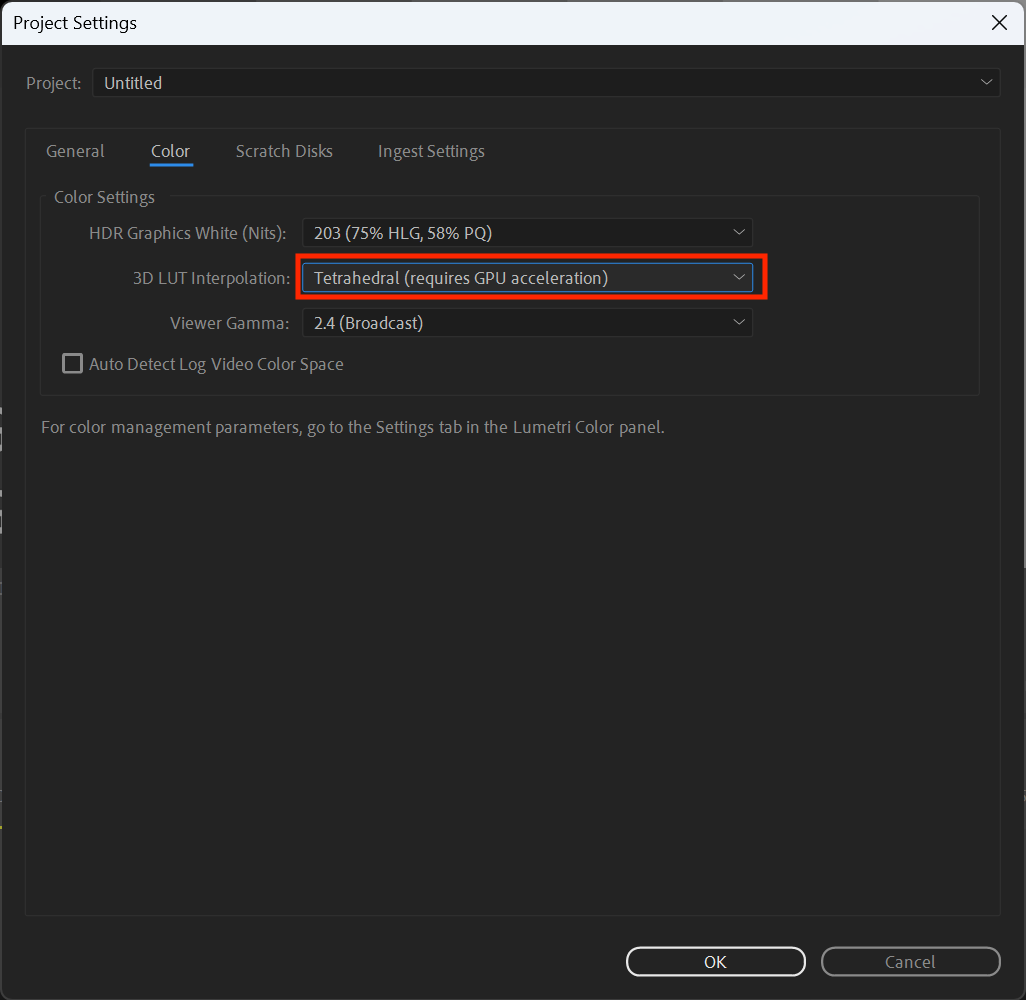
It’s also good practice to check that your project settings have tetrahedral LUT management turned on. You can check it by going to “File – Project Settings – Color…”
Project Settings
As a bonus I’ll also include a link to charts files, that I’m sending with my projects.
3. Uploading
This approach acknowledges the differences in playback on various platforms and aims for the best visual consistency rather than identical technical output. Uploading the original gamma 2.4 (1-2-1) file without conversion will result in accurate playback only on TV, Windows and iOS/iPadOS devices. Link to my mindmap file with test data is also included here.
Bonus test:
Let’s calculate the readings score to verify overall file playback accuracy. This is not scientific but makes sense in my head.
Original values are 25+128+229 = 382
Worst-case scenario players:
2.4 (1-2-1) original file on the web. Values ranged from:
Mac (27-138-233) = 398
Android (42-140-232) = 414
2.4 (1-1-1) converted file on web. Values ranged from:
Mac (21-130-231) = 382
Android (37-132-230) = 399
4. Summary
To import and deliver graded footage correctly for the web, follow these necessary steps:
Check the data levels: Different software may expect different data levels for graded footage. Verify whether the software you are using requires full data levels (0-1023) or video data levels (64-940). This is crucial to ensure an accurate representation of the graded footage.
Adjust data levels if necessary: If the graded footage is imported with the wrong data levels, it will affect the accurate representation of the footage. In DaVinci Resolve, right-click on the clip, select “Clip Attributes,” and adjust the data levels accordingly.
Exporting for Delivery: – For the web: Apply LUT to convert gamma 2.4 to gamma 2.2 to accommodate for different devices.
– For broadcast: Leave settings unchanged for TV playback.
– Use VLC or Screen player in Custom Rec 709, sRGB mode for file review, not QuickTime. The QuickTime inspector should show tags as 1-1-1.
Acknowledgment: There will be slight variations in appearance across devices. When preparing footage for the web, apply a Color Space Transform from gamma 2.4 to 2.2 on the relevant clips to ensure broader compatibility across various devices. For television broadcasts, the original gamma 2.4 should be maintained. This approach acknowledges the differences in playback on various platforms and aims for the best visual consistency rather than identical technical output. The original gamma 2.4 file without conversion will look correct only on Windows and iOS/iPadOS devices. Also, keep in mind that your calibrated display also has to have gamma 2.4 to view the signal correctly.
Thank you for reading!
5. Bonus
How to view content accurately on 2021+ MacBook Pro?
Calibrate your display using the methods shown on this link.
Select the HDTV display profile from the display settings.
Download the content locally or stream via the apps named below.
Use VLC or Screen in Custom Rec 709, sRGB mode to view the content.

